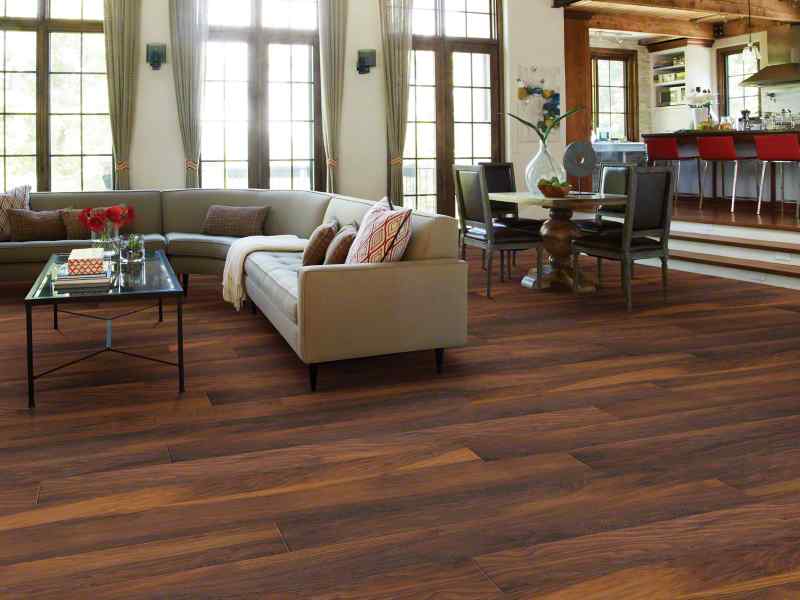
This fashionable floors has unique and beautiful designs that you can match-up in any of your room décor or theme and will bring a fresh new looks to your rooms. It has the look of natural materials with an affordable price. It is a popular choice for its affordable, attractive, low maintenance and easy installation.
You can use laminate flooring in any room in your home. It is a perfect choice for your kitchen, hallways, living room, bed room, dining room and even to your bathroom. Because some types of laminate flooring are 100% water resistance. This is recommended if you choose to have laminate flooring in rooms with a lot of water like bathroom and dining area.
In addition, it would be great if you does have Cheap Vinyl UK playing at the house once the flooring were done and cleaned.
The flooring is strong and durable. It is resistant to stains, impact and scratches so it’s perfect for busy areas, playful kids and pets. So don’t worry it is easy and simple to clean.

Source: https://resource.v4woodflooring.co.uk/2019/02/late-harvest-oak-nature-effect-laminate-sm-800×600.jpg
Laminate flooring has attractive styles and combinations. There’s a lot of tone and textures to choose from to achieve the classy, trendy and traditional look. The materials are made from recycled materials. So it is an eco-friendly option.
Now let’s get started! Here’s how you Install Laminate Flooring in 4 Easy Steps:
- Selecting your Laminate Floor: Analyze the styles and features that you need
Visualize the theme and décor of your room. Satin, matte, hand-scraped, natural wood, soft scraped, oiled wood, high gloss, oxide surface and slate these are the designs you can choose from. Take small laminate samples and imagine how it looks like to your room. Don’t be afraid to explore and combine designs of your option.
Source: http://decorfloors.ca/wp-content/uploads/2017/10/Brampton-Laminate-Floors.jpg
Remember style is just your starting point. You should also check Thickness and Abrasion Rating System. These two factors are important to have long-lasting laminate floors. Thickness range from 7mm to 12 mm. The thicker the better. It is easier to lay against uneven subfloors when you use thicker floors. And Abrasion Rating System or AC System represents the durability of your laminate flooring. AC rating scale of 1 to 5. The higher the more resistant it will be to scratches, stains and footsteps. Use AC3 and up for busy areas such as your entrance and kitchen.
After choosing your laminate flooring, it’s time to start installing!
- Preparing your room project: Make sure your subfloor is clean, dry, smooth and ready to go
Laminate flooring can be installed in any surface such as concrete, ceramic and plywood. Make sure your subfloor is clean, dry and smooth. Remove all nails, staples, scraps, dust and all debris. Use knee protection to avoid aches and pains.
Source: https://landrywoodflooring.com/assets/images/landry-wood-flooring-hardwood-floor-install-800×600.jpg
Remove your baseboard and carpet if you have it. Make sure that you removed all sharp nails around the room. It’s important that your subfloor is smooth and flat, so when you lay your laminate flooring, it’s smooth and you will not step on any bumps.
If you’re using concrete flooring, make sure to add a dry core panel as your subfloor, plus a moisture barrier. It will warm up the floor and help air circulation underneath.
- Installing a quality underlayment: Before installing your laminate floor for an excellent performance
Underlayment is another layer of material that is placed above your subflooring and below you laminate floors. This is also an important step when you install any type of flooring. It helps absorb noise and smoothen any subfloor imperfections.
You should never install your laminate flooring directly above the subfloor, especially when you’re building over concrete floors in your basement. To prevent cupping, gapping and squeaking due to expansion, a foam underlayment can work as moisture barrier. There’s a lot of underlayment selection available with features and benefits that suits your room and needs.

Source: https://jhf.co.nz/wp-content/uploads/Classic-Midnight-Oak-Natural-Plank.jpg
Lay it over your subfloor, covering it completely without overlap. Remove the tape strip on the side and press it down to secure it in place on the floor.
Now for the final stage.
- Completing your project: Installing your laminate floor
Always remember to check your manufacturer’s instructions. Some will recommend you to leave your laminate flooring package in the room for short period of time. Your planks will adjust to humidity and room temperature, so you can avoid little spaces and buckling in your flooring. Check and investigate all your planks before and during the installation progress for any defects.
Starting at the longest wall, you may select planks from more than one package at a time. It will balance the color variation and avoid too many light and dark planks beside each other.
To create a small gap that allows expansion and contraction, add spacers against the wall. Begin to build your first row against the spacers. You can also hold them in place by laying a weight on top of the first plank of each row.

Source: http://www.batterseacarpets.co.uk/images/l1.jpg
Every laminate flooring plank has a joint and it is a unique wood work joint that is attached with edge to edge with two or more pieces of timber and float above the subfloor. Try to move them at least 12 inches at a time; you’ll need to use a saw to cut some pieces at its exact length. Remember to wear your safety glasses because safety is the number 1 priority.
Make sure that you will use the right tools if you encounter barriers such as door frames, vents or cabinets. A jigsaw will cut your flooring to fit, and you can also look to your manufacturer’s instruction if there’s any confusion on how to use a tapping block. Use silicone caulk around your tub or toilet for a water-tight seal when you’re installing laminate flooring to your bathroom.
For the last row, measure the distance between the wall and last row, minus the expansion gap. Now that you measure the width needed for the last row. Don’t measure from the tongue when cutting the line on your plank. Cut the plank along the line, and if needed, insert the last row with a pull bar.
Always remember to follow the manufacturer’s instructions for installing transition strips and floor moulding. Trim the excess from the perimeter around the floor. Attach your baseboard moulding to the wall, not the floor.
Great! Now that you’re done, it’s time to relax and enjoy your new wonderful laminate flooring that will last for years.